DIY Marble Tray: Sophisticated Elegance at Your Fingertips
Marble is one of those classic materials that happens to be quite trendy right now. Which seems strange to say a classic décor particular is trendy, but there it is. One dilemma with incorporating marble into one's décor might be the cost – marble, luxe equally information technology is, is not inexpensive.
 View in gallery
  View in gallery
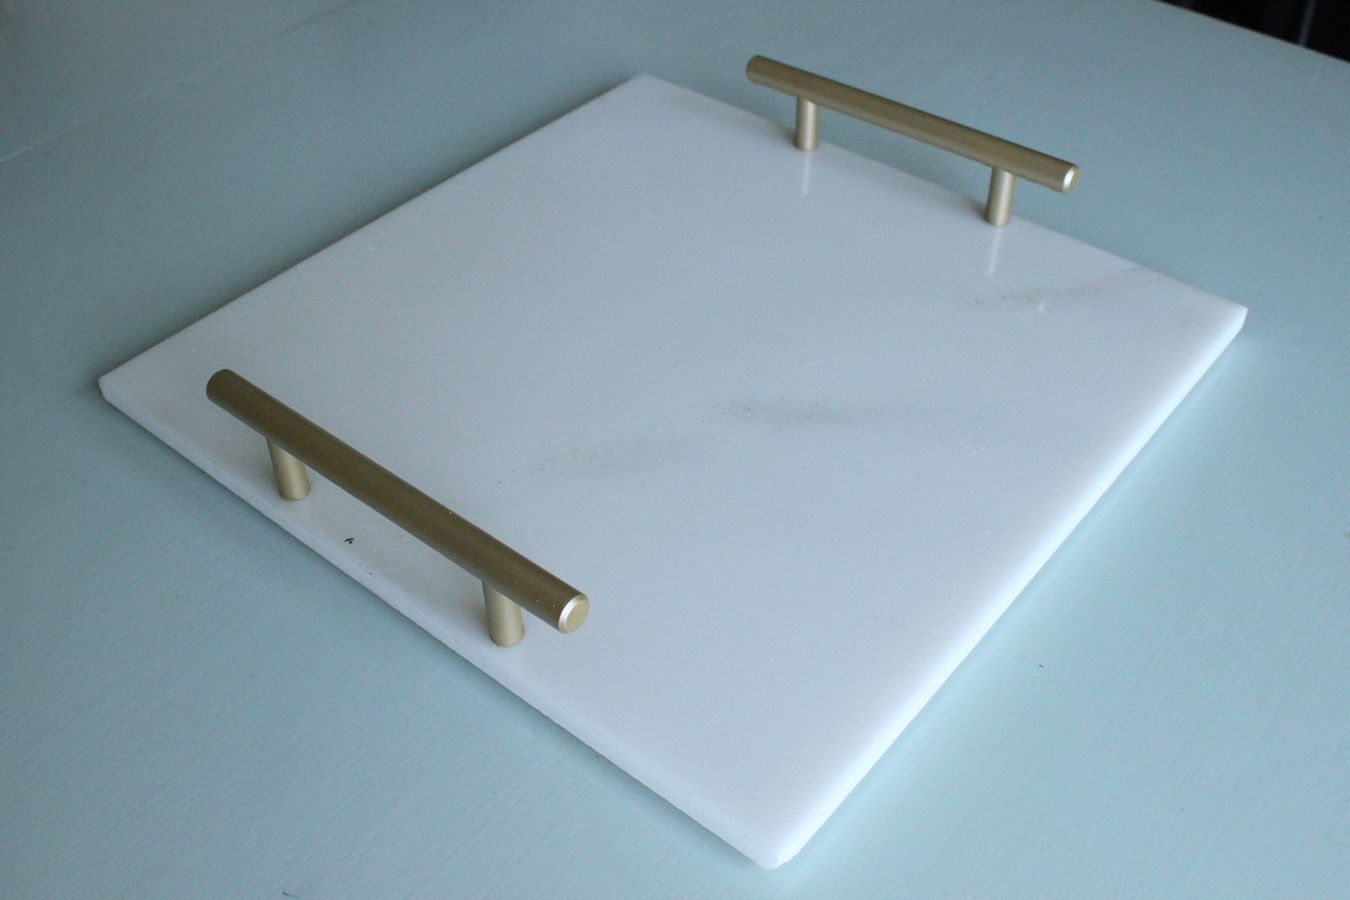
 Merely there are definitely ways you can integrate marble pieces that add sophistication and elegance to your infinite without breaking the banking concern. This DIY marble serving tray is just such a way. And, bonus, it's a straightforward and simple DIY that you can chop-chop consummate…and relish for a long time afterward.
 View in gallery
 DIY Project: Decorative Marble Tray
DIY Level: Beginner
 View in gallery
 Materials Needed:
- I (1) marble tile of your choice (example shows 12" x 12" tile)
- 2 (ii) cabinet pulls of your choice
- Four (4) vinyl bumpers, ane/2″ or larger recommended
- Loctite GO2 Gel (or other adhesive appropriate for apply with rock and metal)
- Spray paint (optional, for pulls)
- Measuring tape (optional, not shown)
Step one: Spray paint hardware (optional).
 View in gallery
 If your hardware isn't the color you lot want, outset things off by spray painting them the color that volition work for you. I used a subtle gold spray paint + primer by Krylon, just you could utilize anything. Let these dry out completely.
Step 2: Place vinyl bumpers.
 View in gallery
 Carefully flip your marble tile over and place your four vinyl bumpers on the tile'due south underside corners.
 View in gallery
 Push button the bumpers securely to make sure they adhere.
We're halfway washed already, tin you believe it?
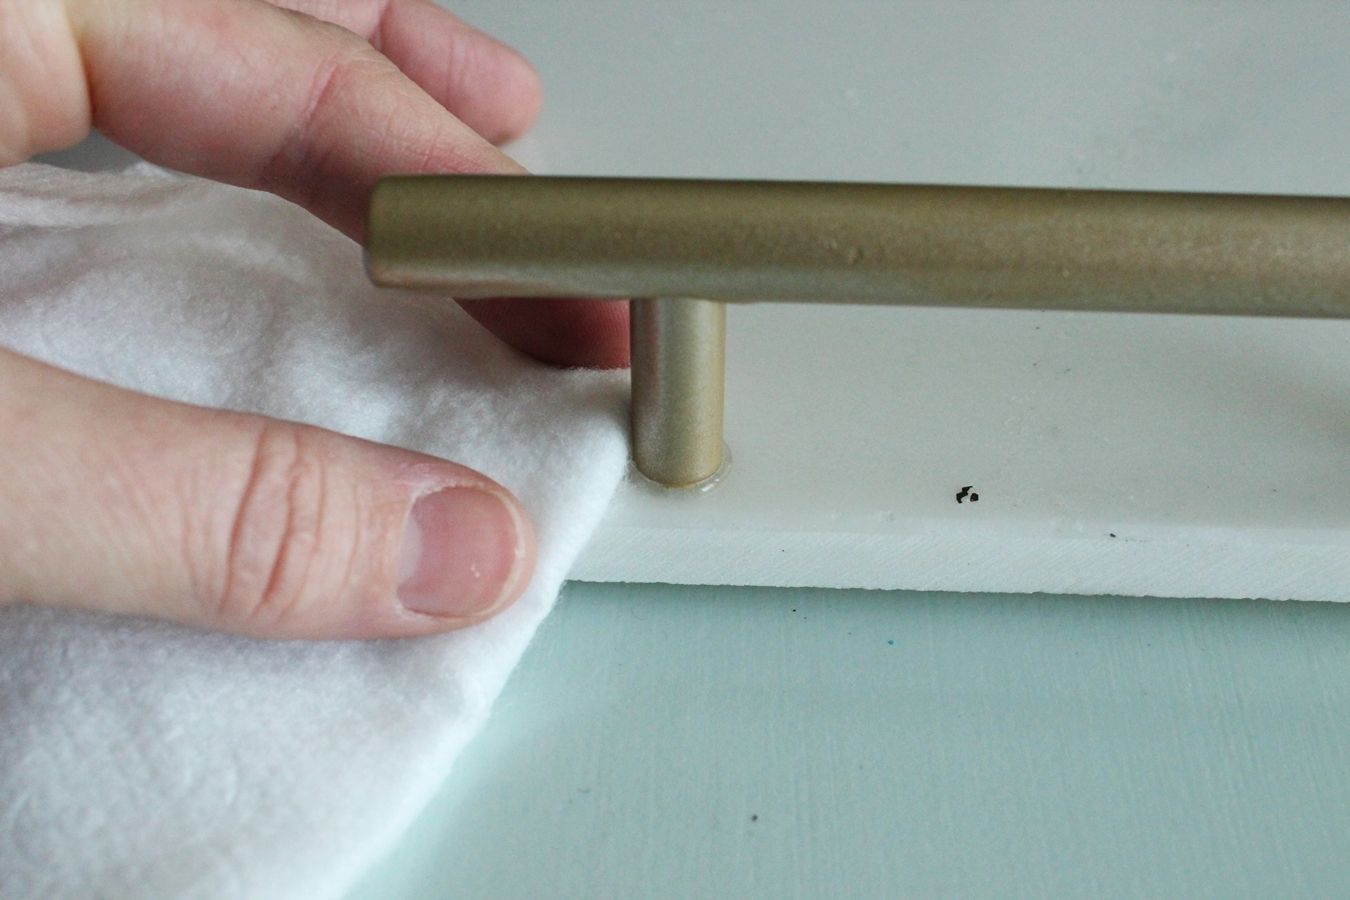
Step 3: Glue handles onto tray.
 View in gallery
 When your hardware is completely dry (if you've painted it), you're set to attach them to your marble tile. Take hold of a measuring tape and have it handy. Then put a small yet adequate dab of Loctite GO2 Gel onto both attachment ends of one handle – the goal is to apply enough that it will cover the small round hardware end simply non squeeze out all over the place when pressed downward.
 View in gallery
 Using the measuring tape as a guide, center the handle over the tile…
 View in gallery
 …and carefully set up it downwardly, then press. Make certain your handle is centered and too parallel to the edge of your tile.
 View in gallery
 If any agglutinative squeezed out, utilize a slightly damp paper towel to carefully wipe information technology abroad. Your handle will slide around if you affect it at this betoken, so accept care non to move the handle itself.
 View in gallery
 After wiping around the fastened hardware department, I think it looks much cleaner. Echo Step 3 for the other handle.
Step four: Let dry.
 View in gallery
 You'll want to set your tray in a safe identify where it won't be disturbed until it's completely dry and set, near 24 hours. Don't touch on…simply you can definitely admire!
Step 5: Enjoy your chichi new tray!
 View in gallery
 While the adhesive is strong when it'south dry, it's risky to try to pick up your marble tray with the handles alone. Then don't do information technology! Always pick upward and carry the tray past the marble tile itself.
 View in gallery
 We hope you lot savor the spot of sophistication this DIY marble tray lends to your space, wherever it may be. For being such an like shooting fish in a barrel project, the end result is a gorgeous particular.
 View in gallery
 Happy DIYing!
Source: https://www.homedit.com/diy-marble-tray/
0 Response to "DIY Marble Tray: Sophisticated Elegance at Your Fingertips"
Post a Comment